Weekly Meal Plan Template [Google Sheets]
If you’re looking for a way to meal plan more efficiently, you’ll want to check out the meal plan template made in Google Sheets.
This template makes it easy to create a menu for the week and allows you to keep track of what you need to buy at the grocery store.
In this article, I’ll show you how to use the free Google Docs template and provide some tips for creating a meal plan that works for you.
GET THE TEMPLATE
Meal plan template – just click on the link to make your own editable copy in Google Sheets.
Jump to sections:
- Why Use Google Sheets For Meal Planning?
- How To Create a Meal Plan in Google Sheets?
- Get Free Google Sheets Meal Plan Template
- How to Use Weekly Meal Planner Template
- Frequently Asked Questions
Why Use Google Sheets For Meal Planning?
Google Sheets is a free, online spreadsheet application that allows you to create and format spreadsheets. It is a great tool that can help you keep everything organized in one place.
Here are some benefits of using Google Sheets when it comes to planning out your meals:
- You can access it from anywhere – since it’s online, you can access your meal plan from any device with an internet connection.
- It’s easy to share with others.
- You can print it out if you want a physical copy.
- You can add a grocery list to the template so you don’t forget anything when you’re at the store.
- Helps minimize food waste.
- You can compare it with what you have in your pantry and fridge before going grocery shopping.
- It’s easy to make changes – if you need to switch up your meal plan for the week, you can do so without having to start from scratch.
- You can ensure that the foods you enter have correct nutritional information which minimizes the chances of hitting macros but not calories.
- And the best part? The Google Sheets application is free to use!
Furthermore, you can use Google Sheets not only for meal planning but also for tracking your calories and creating custom workouts.
How To Create a Meal Plan in Google Sheets?
Now that we’ve gone over some of the benefits of using Google Sheets for meal planning, let’s take a look at how to create such a template.
Creating the meal plan template is pretty simple – just follow these 7 steps:
- Open up Google Sheets and create a new spreadsheet.
- Create two sheets – one for the meal plan and one for the grocery list.
- Label the columns on the meal plan sheet tab.
- Enter your meals for each day of the week.
- On the grocery list sheet tab, add all of the ingredients you need to make the meals on your meal plan.
- You can add the items to the grocery list as you enter them on the meal plan sheet tab, or you can wait until you’ve added all of the meals and then add the ingredients to the grocery list all at once.
- Once you have all of the ingredients on the grocery list, you can check off the items as you add them to your shopping cart.
And that’s it!
You now have a meal plan for the week that you can refer to when you’re grocery shopping and planning out meals for the weeks ahead.
The process is pretty straightforward, but if you want to save time, you can get my free meal plan template here.
Get Free Google Sheets Meal Plan Template
GET THE TEMPLATE
Free meal plan template – just click on the link to make your own editable copy in Google Sheets.
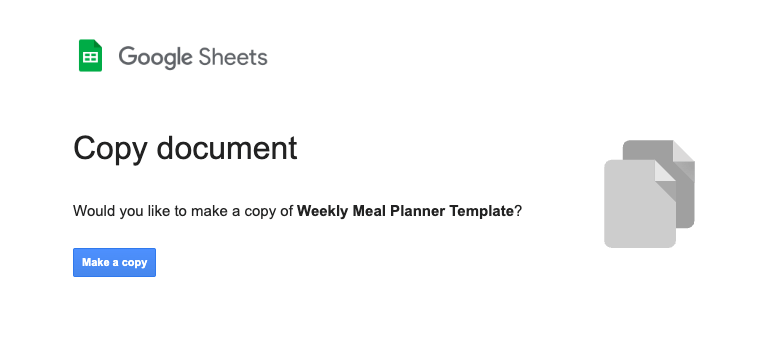
The moment you click on the link and click the “Make a copy” button, a new Google Sheet will open up in your browser where you can start meal planning right away.
How to Use Weekly Meal Planner Template
Now, let’s take a look at how to use the meal planner template in Google Docs.
There are three sheet tabs – DATA, Meal Plan, and Grocery List:
- On the DATA sheet tab, there is a list of all food items that you can add to your grocery list. It’s also the place where you can add meals you regularly eat, but more on this later.
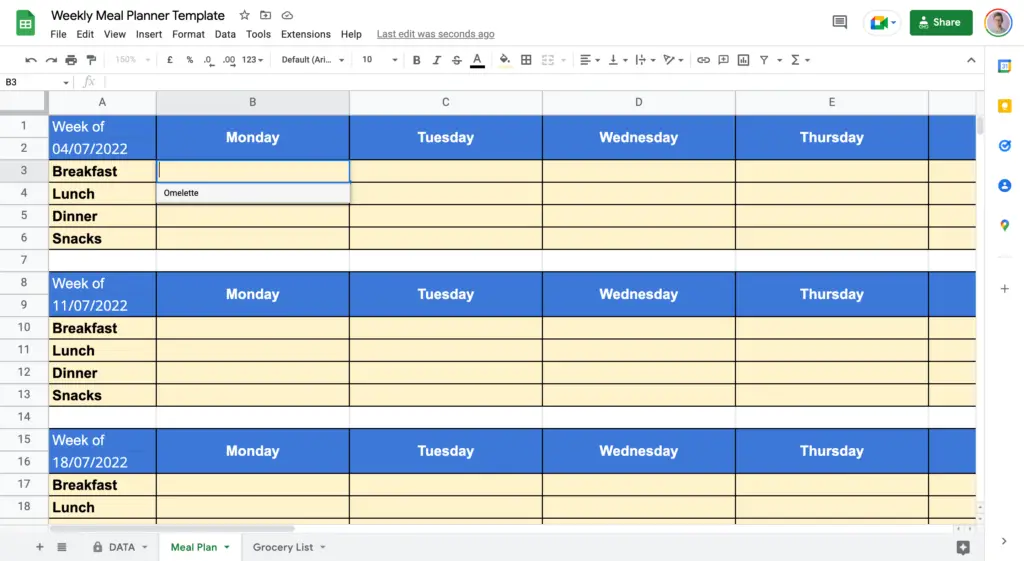
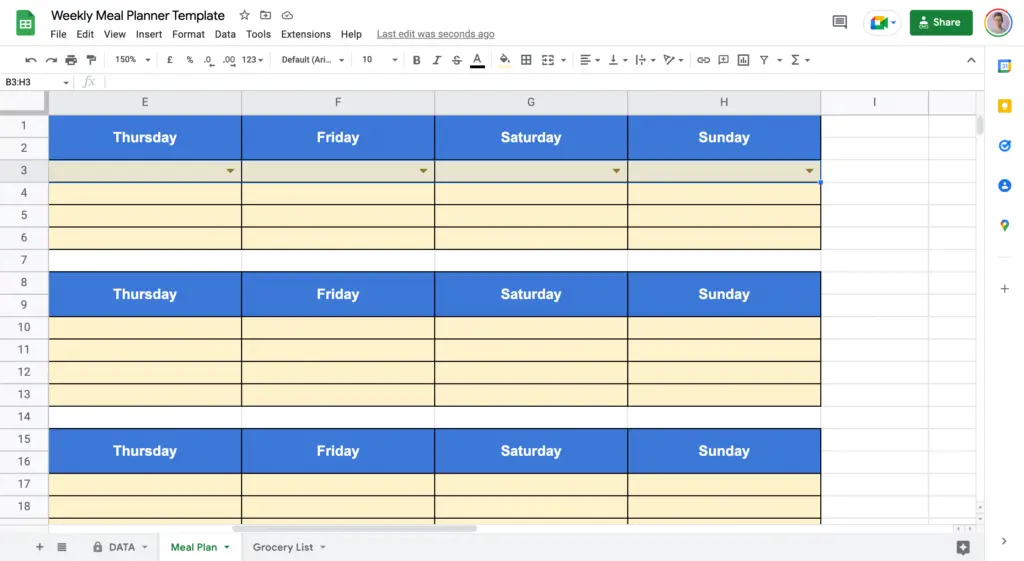
- On the Meal Plan sheet tab, there is a weekly meal planner.
- And on the Grocery List sheet tab, there is a list where you will add all the food ingredients you need to make the meals listed on your meal plan.
1. Fill in Your Weekly Meal Plan
On the meal plan sheet tab, you will see that there are seven columns – one for each day of the week.
For each day of the week, there are rows for:
- Breakfast
- Lunch
- Dinner
- Snacks
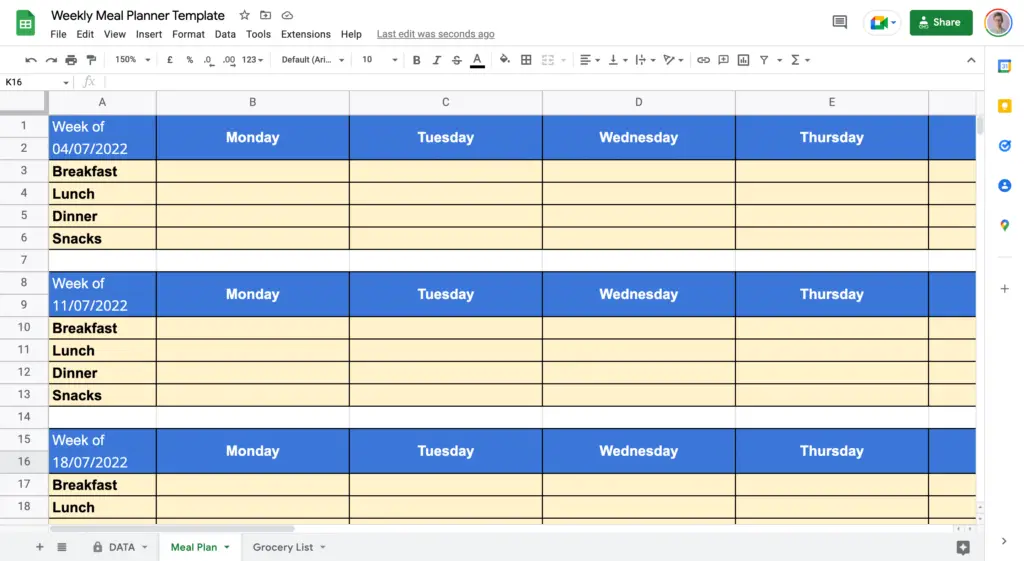
First, you will need to enter the date for the first Monday of the first week, under the cell with the value “Week of”. Note that this will also auto-populate the dates for the following 3 weeks.
You will then need to start filling out your meals for the week.
Simply enter the meals you want to eat for each meal of the day.
You can enter the name of the meal, and/or you can add a link to the recipe.
If you want to add a link to the recipe, click on the cell where you want to enter the link and then click on the “Insert” menu at the top of the screen and select “Link.”
A pop-up window will appear where you can enter the URL of the recipe.
After you’ve added the link, the name of the meal will appear in blue and you can hover over it to see a preview of the recipe web page.
2. Select Food Items for the Grocery List
Now that you’ve added all of the meals to your meal plan, it’s time to add the ingredients to your grocery list.
To do this, go to the Grocery List sheet tab and select the food items you need for each meal.
First, you will need to choose “Food Source/Category”. In my example below, I choose – Protein.
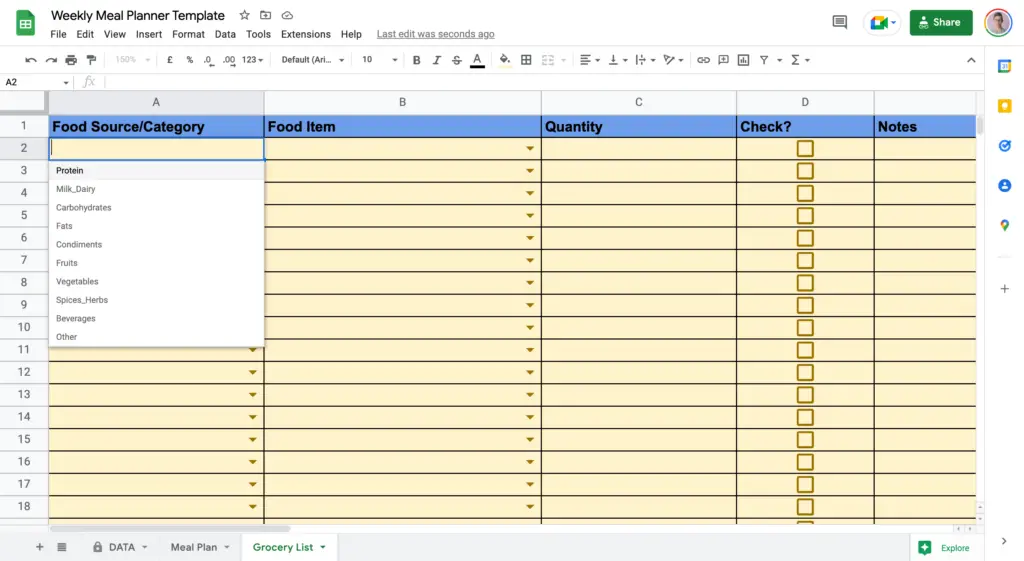
You will then need to choose the “Food Item” you want to add.
In my example below, I am adding Skinless Chicken Breast.
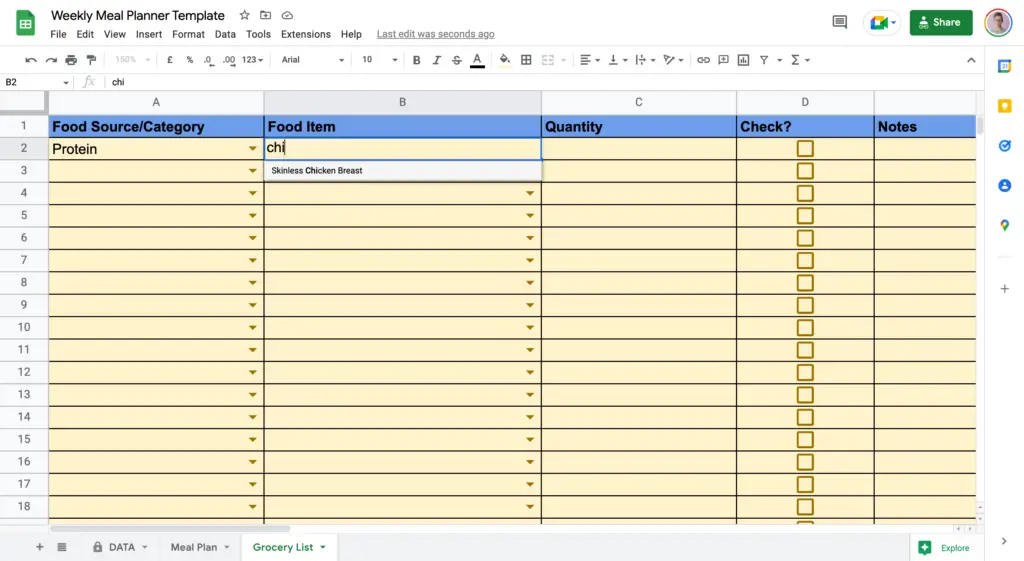
You can either select the food item from the list or you can type the name of it and it should appear, as long as it’s listed in the DATA sheet tab, under the appropriate food category.
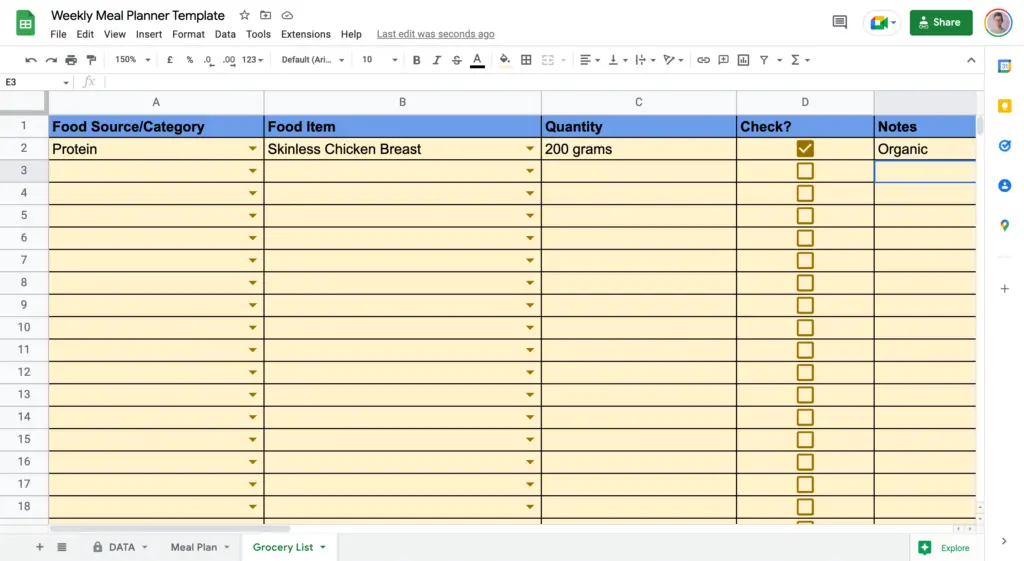
In the “Quantity” column you can input the quantity of a given food item. In my example, I typed 200 grams. Lastly, you can add some important notes under the “Notes” column.

3. Track Food Items in the Grocery List
Once you’ve added all of the missing food items to your shopping list, you can track which ones you’ve already put in your cart, while you’re at the grocery store.
To do this, simply check the “Check?” box next to the food item on the grocery list.
This way, you can easily see which food items you still need to buy.
4. Customize the DATA Sheet Tab
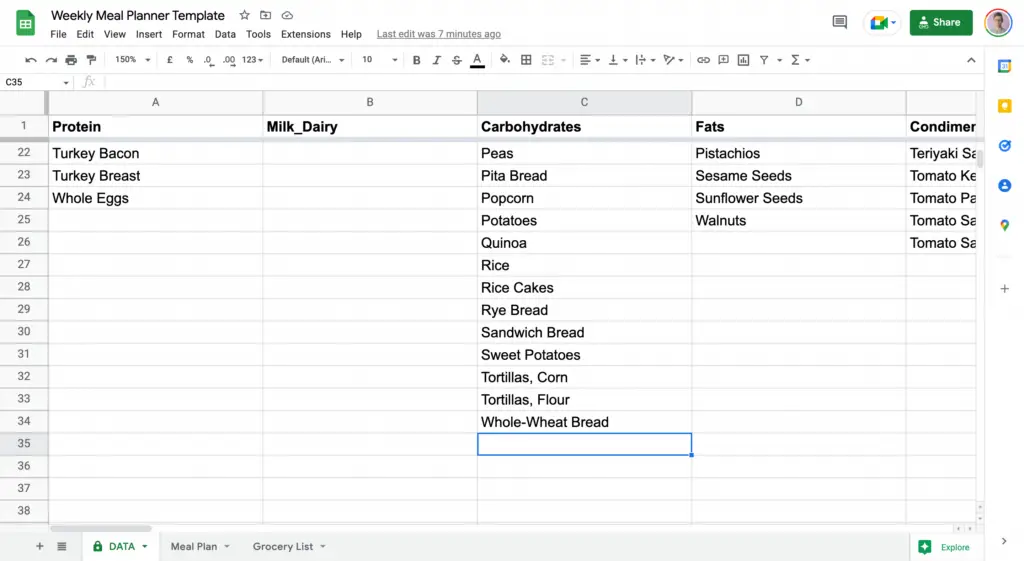
As I mentioned before, the DATA sheet tab is where you can add meals you regularly eat as well as new food items to your grocery list.
To add new food items – just enter the name of the food item under the appropriate food category and it will appear on your grocery list the next time try to find it under that category.
Note that the DATA sheet tab is protected, so every time you want to edit something there you will get a pop-up window with a notice.
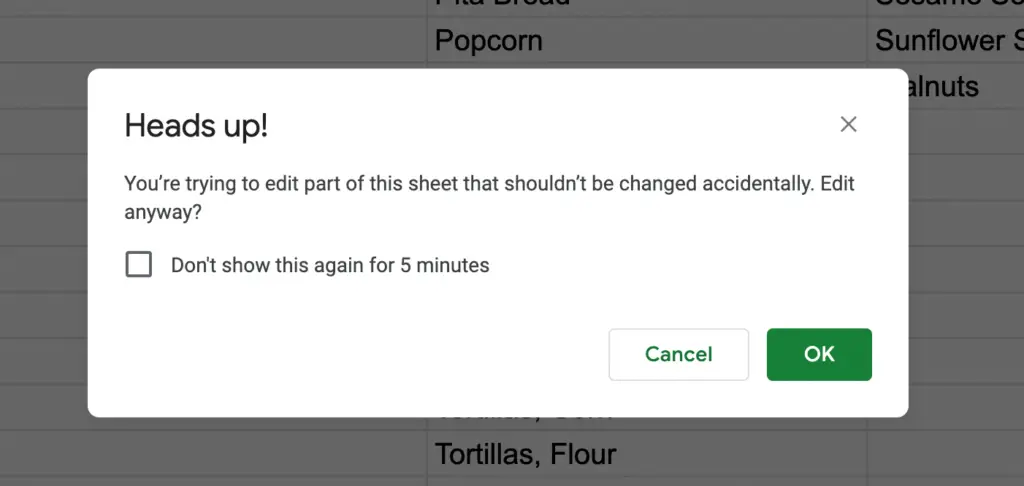
To edit one cell, simply click “OK”.
If you are going to edit multiple cells then you can tick the box “Don’t show this again for 5 minutes”.
So, that was all about adding new food items to your grocery list.
Now, let’s see how you can add new meals to your meal plan – this will be a bit more complicated but I will try to explain it as best as I can.
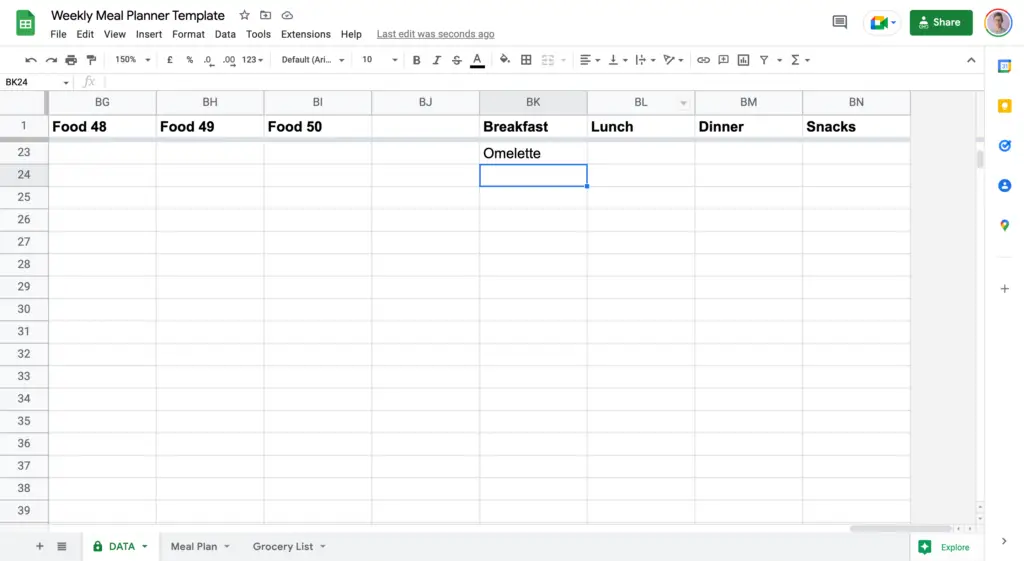
Similar to adding food items – go to the DATA sheet tab and enter the name of the meal under the appropriate meal category – breakfast, lunch, dinner, or snacks.
You will find the columns representing these categories in columns BK (for Breakfast), BL (for Lunch), BM (for Dinner), and BN (for Snacks).
In my example below, I am adding an “Omelette” meal to my breakfast meal category.
After that, you will have to add Data Validation to the meal you’ve just added.
Data validation is used to create drop-down lists in cells and to restrict the type of data or values that you can enter into a cell.
NOTE
You can still type in values that are not on the list, but a warning message will appear if the value is not valid, which is completely fine.
To add Data Validation to a cell, select the cell where you want to add the dropdown for all the meals (under the specific meal category) you have added in the DATA sheet tab, and then go to Data > Data Validation.
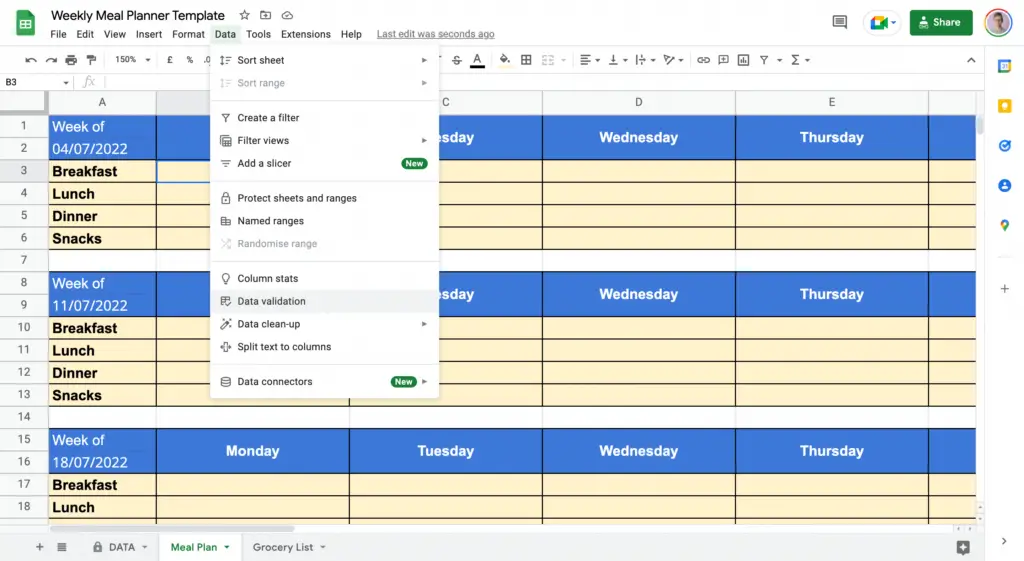
Then you will have to enter a range of cells that contain the data you want to appear in your drop-down list.
So, go back to the DATA sheet tab.
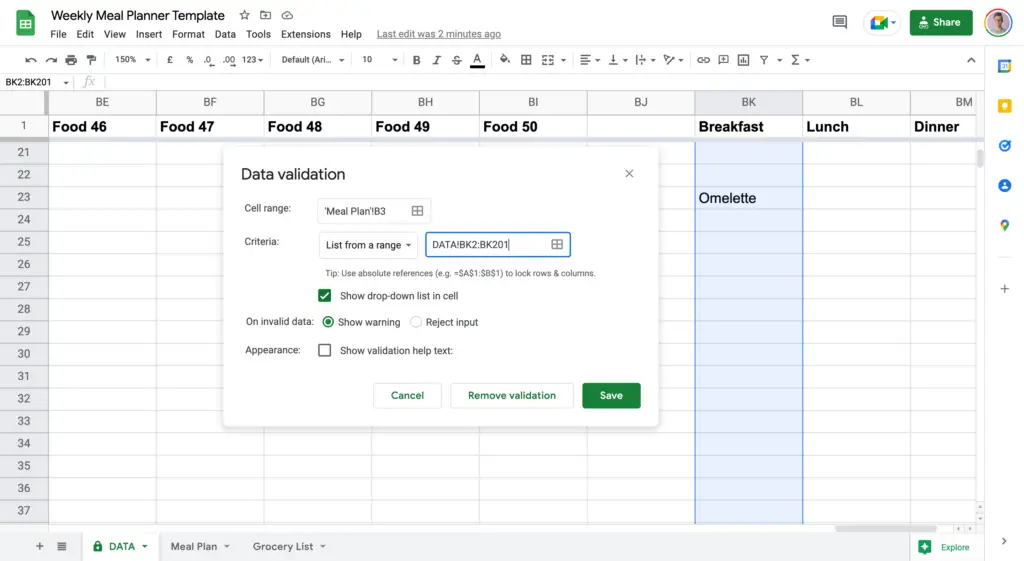
In my example, I am using the range “=DATA!$BK$2:$BK$201” because I only want to see the meal I’ve just added under the Breakfast meal category.
I made the range so big to account for future meals I might add – I suggest you do the same.
Click Save!
After you’ve added Data Validation, go back to your Meal Plan sheet tab and you should see a drop-down list in that cell showing the meals you’ve just added.
You can now select the meal you want to eat for breakfast from the list.
Next, you will need to copy this to other cells by hovering your mouse over the bottom right corner of the cell until you see a plus sign (+), and then click and drag it horizontally across under other days of the week to add the same drop-down list.
You will then have to repeat the process for other weeks, as well as other meals – lunch, dinner, and snacks.
And that’s it!
Frequently Asked Questions
How Do You Structure a Meal?
To structure a meal, think of which food item you would like to eat from each of the macronutrients. Then form meals around those food items.
For example, when coming up with dinner, I might want the steak as the source of protein and healthy fats, and potatoes as a carbohydrate source, when it comes to veggies, I could choose asparagus.
You can use this method for each meal of the day.
How Do You Make a Grocery List in Google Sheets?
To make a simple grocery list in Google Sheets, you will need to create a new spreadsheet with columns for the food item and some sort of a checkbox next to it.
In the first column, enter the food items that you need to buy. In the second column, add a checkbox next to each food item. This will help you keep track of what you have and haven’t got. Additionally, you can add a column for notes, where you can enter the quantity or other kind of information about the food item that you need to buy.
To save time, you can get this grocery list made in Google Sheets instead. It includes all the above-mentioned columns, plus a few more, and a rich database of food items.
Furthermore, if you are in a bulking or cutting phase, you can get a grocery list, filled with food items better suited for either phase:
- Bulking grocery list
- Cutting grocery list (which can also be used during a mini-cut)
How Do I Make a Monthly Meal Plan?
To make a monthly meal plan, simply fill in the meal plans for all the weeks of the month in the meal plan template I provide in this article.
You can use the same meal plan for multiple weeks, or you can mix it up and try new recipes each week.
Final Thoughts
Google sheets meal plan template can help you save time and money, by meal planning in advance.
A meal plan can also help you eat healthier, as you will be able to better control what goes into your meals.
If you are looking for a meal plan template, you can get one here.
I hope this article has been helpful in showing you how to use the template. If you have any questions, please let me know in the comments below or contact me personally via a contact form.